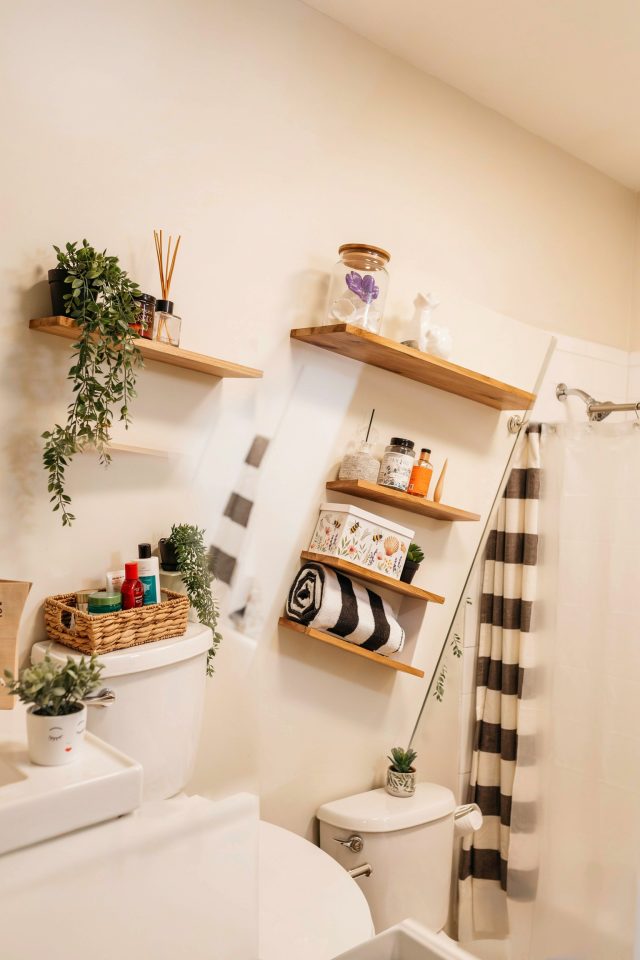
If your bathroom feels cramped and cluttered, you are not alone. Finding bathroom shelving ideas that actually work in a small space can feel like a puzzle. The good news is you do not need a huge renovation or a big budget to create a more organized, functional room. With a few smart storage solutions and a little DIY effort, you can turn your tiny bathroom into a tidy, pleasant space. This post is written for absolute beginners, so do not worry if you have never picked up a drill before. I will walk you through simple, practical ideas that anyone can tackle.
Why Small Bathroom Storage Needs a Smart Approach
Bathrooms are usually the smallest rooms in a house, yet they hold towels, toiletries, cleaning supplies, and often extra linens. Without proper storage, things pile up on countertops and the floor. That is where small bathroom storage becomes a game changer. Adding shelves is the easiest way to gain vertical space without taking up any floor area.
When you think about bathroom organization, the goal is to keep everyday items within reach while hiding clutter. Shelves let you do both. You can store your daily essentials like toothbrushes and soap on open shelves, and tuck away backups in baskets or bins on higher shelves. This approach works for renters too because shelves can be installed with damage-free adhesive brackets or tension rods.
If you are on a tight budget, DIY bathroom decor is your best friend. A few planks of wood, some brackets, and a can of paint can cost less than a store-bought cabinet. Plus you get the satisfaction of making it yourself. Let us look at specific ideas that are beginner friendly and budget conscious.
Floating Shelves: The Easiest DIY Upgrade for Any Bathroom
Floating shelves are popular for a reason. They are sleek, do not take up floor space, and they work above toilets, next to mirrors, or in empty wall corners. If you are new to building shelves, this is a great place to start. You only need a wooden board, two or three L-shaped brackets, screws, and a level.
Many hardware stores will cut wood to size for free. Ask for a board that is about 24 inches long and 8 inches deep. That depth is perfect for holding standard bottles and jars without sticking out too far. Sand the edges to avoid splinters, then paint or stain the wood to match your bathroom. Let it dry completely before installation.
To install, find the wall studs using a stud finder. If you cannot hit a stud, use wall anchors designed for drywall. Hold the bracket against the wall, mark the screw holes, drill pilot holes, and screw the bracket in place. Then lay the wooden board on top and secure it from underneath with small screws. It is that simple. You can make a row of two or three floating shelves to store folded towels, jars of cotton balls, and small baskets.
- Tools needed: drill, level, stud finder, screwdriver, measuring tape.
- Supplies: wooden board, L-brackets, wall anchors (if needed), screws, paint or stain.
- Estimated cost: around $15 to $30 per shelf, depending on wood type and finish.
For a renter friendly option, use heavy duty adhesive strips or removable command shelves. These hold up surprisingly well for lightweight items like rolled washcloths or decorative jars. Just make sure the wall is clean and dry before sticking them on.
Over the Toilet Shelving: Making Use of Dead Space
The area above your toilet is often completely wasted. If you have a small bathroom, that spot can become a storage powerhouse. Over the toilet storage does not have to mean a big metal rack. You can build a simple wooden shelf unit that fits right over the tank.
One beginner friendly design uses two vertical pieces of wood that sit on the tank lid and extend upward, with horizontal shelves connecting them. Measure the width and depth of your toilet tank first. The vertical boards should be about 4 to 6 inches longer than the tank height, and the shelves should be slightly wider than the tank. You can attach the shelves with pocket screws or even wood glue and nails.
For a faster version, buy a wooden spice rack or a wall mounted shelf and install it directly above the toilet, as high as you need. Because toilets are low, you want the lowest shelf to sit at least a foot above the tank so you can still lift the lid. Store extra toilet paper rolls, a small vase, or extra hand towels there. This keeps supplies close but out of the way.
If you are not handy with a saw, look for ready made over the toilet shelves at thrift stores or online marketplaces. You can often find them for under $20. Give them a fresh coat of spray paint and they will look like new. That is a big win for budget bathroom projects.
Rustic Ladder Shelves: A Simple Weekend Project
A rustic ladder shelf is a freestanding storage piece that leans against the wall. It requires no drilling or wall mounting, which makes it perfect for renters or anyone who wants a flexible solution. You can use it in the corner or next to the sink. The ladder design has a charming, casual look that works with almost any decor style.
Building a ladder shelf is straightforward if you can follow a few steps. You need two long wooden boards for the sides and three or four shorter boards for the rungs (the shelves). Determine how tall you want the ladder. A common height is about 5 to 6 feet, with rungs spaced about 14 inches apart. Cut the rungs to about 16 to 18 inches long for a narrow ladder, or up to 24 inches for wider storage.
Assemble the ladder by attaching each rung to the side boards using screws or wood glue. Use a carpenter’s square to make sure each rung is level. Once the frame is dry, sand everything smooth and apply a coat of stain or paint. For a truly rustic look, use a darker stain and leave the edges a little rough. Let it dry overnight, then lean it against a wall and load it up with rolled towels, baskets, and a small plant.
The best part about a ladder shelf is that you can move it whenever you want. If your bathroom layout changes, just pick it up and put it somewhere else. It also adds a cozy, handmade feel to the room. That is real DIY bathroom decor that anyone can accomplish.
Creative Corner Shelving for Tight Spaces
Corners in a small bathroom are often ignored. But a corner shelf can turn an unused nook into a display spot for toiletries or decor. You can buy ready made corner shelves, but building your own is even cheaper and more customizable.
One easy method uses two pieces of wood cut into triangles. Cut a square piece of wood diagonally to get two equal triangle shelves. Then mount them in the corner using corner brackets. The brackets screw into the wall at a 45 degree angle. This gives you a sleek, almost invisible support system. Paint the triangle shelf the same color as the wall to make it blend in, or use a contrasting color for a pop of interest.
If you do not want to cut triangles, you can use a simple rectangular shelf that spans across a corner. Cut a board to a length that fits from one wall to the other, then attach it with small L brackets on each end. This creates a little ledge for a candle or a small jar of cotton swabs. It is a very subtle way to add bathroom corner storage.
For renters, consider adhesive corner shelves from the hardware store. They usually come with a strong foam tape that sticks to tile or painted walls. Check the weight limit first. Stick them up, wait 24 hours before placing items, and you will have instant corner storage with zero damage.
Budget Friendly Materials and Where to Find Them
You do not need to spend a lot to build bathroom shelving. The whole point of DIY bathroom decor is saving money. Start at your local hardware store or lumberyard for pine boards. Pine is cheap, easy to cut, and takes paint well. A 1×8 board, which measures about ¾ inch thick and 7¼ inches wide, costs around $10 for an 8 foot length. That is enough for two or three shelves.
Thrift stores and garage sales are goldmines for materials. Look for old cutting boards, wooden crates, or even small ladders. A vintage crate can be mounted on the wall as a shelf with minimal effort. Just sand it lightly, add a coat of varnish, and screw it into wall studs. It adds character and costs almost nothing.
If you want a more finished look without the labor, check online classifieds for free wood pallets. Pallet wood can be broken down, planed, and cut to size for a rough or industrial style shelf. Just be careful about splinters and make sure the wood is dry. A power sander is a worthwhile investment for this kind of project.
For brackets, look for simple black metal ones at discount stores. They often come in multipacks for under $5. Spray paint can update any old bracket or piece of wood. A can of matte white or black spray paint costs about $4 and can transform thrifted finds into something that looks intentional and polished.
Quick Organization Tips to Keep Your Shelves Looking Great
Once you have your shelves installed, the next step is small bathroom organization. Without a system, shelves can quickly become cluttered. Here are some practical tips to keep things tidy.
Group items by frequency of use. Keep daily items like toothbrushes, toothpaste, and face wash on the lowest shelf. Place backup items like extra soap or toilet paper on higher shelves. Use small baskets or jars to hold small items, which prevents them from rolling around. Clear glass jars look clean and let you see what is inside. Or use pretty ceramic containers to add color.
Limit how much you put on each shelf. A good rule is to leave about 30 percent empty space. This makes the shelf look intentional rather than crammed. Rotate seasonal items. In summer, replace heavy lotions with lighter ones. In winter, bring out thicker creams. That way your shelves always feel fresh and not overloaded.
If your bathroom gets humid, choose materials that can handle moisture. For wooden shelves, seal them with a waterproof polyurethane finish. You can also use plastic or metal alternatives if you prefer. Wipe down shelves weekly to prevent dust and mildew buildup. A quick spray with a vinegar and water solution keeps things sanitary without harsh chemicals.
Finally, do not be afraid to mix functional storage with a little personality. A small plant, a framed photo, or a pretty soap dispenser adds life to the room. Your bathroom should feel like a place you want to spend time in, not just a utility space.
Organizing a small bathroom on a budget is completely doable. Start with one DIY shelving project this weekend, whether it is floating shelves above the toilet, a leaning ladder, or a corner shelf. You will be surprised how much more spacious and calm your bathroom feels. Give it a try and enjoy your newly organized space.
#bathroomshelving #smallbathroomstorage #bathroomorganization #DIYbathroomdecor #budgetbathroom
Leave a Comment