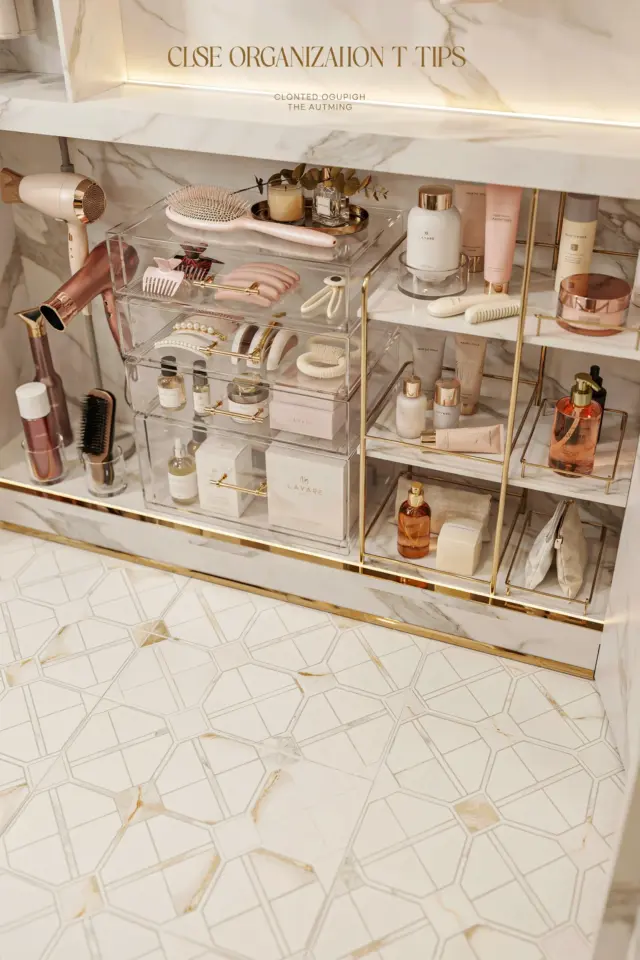
Why a Stackable Design Works for Small Closets
If your closet looks more like a drugstore explosion than a serene space, you might be ready for a stackable cosmetic organizer for closet. These clear acrylic drawers let you see everything at once without digging through piles. They also turn wasted vertical inches into usable storage, which is a game changer for reach-in closets where shelf space is limited.
Unlike bulky plastic bins, acrylic stacks are modular. You can add or remove layers as your collection grows. I have used these in my own narrow closet for over a year, and they freed up an entire shelf for shoes. The transparency means I never buy a duplicate lipstick again.
Step 1: Sort Your Collection by Category
Before you buy any drawer, empty every makeup bag and pouch onto your bed. Group items into categories: lip products, face makeup, eye shadows, brushes, and tools. This sounds obvious, but I have seen friends skip this step and end up with mismatched organizer sizes.
Take a quick inventory. How many lipsticks do you own? How many foundation bottles? This number tells you exactly what drawer dimensions you need. For example, a standard lipstick is about 4 inches tall, so a drawer that is 3 inches deep will not work.
- Lipsticks and glosses need a drawer at least 4.5 inches tall if stored upright, or 2 inches if laid flat.
- Foundation and concealer tubes vary, but a 5-inch tall drawer fits most standard bottles.
- Brushes are best in a wide, shallow drawer with dividers so the bristles stay protected.
- Small items like eyeliner pencils and mascara can share a 3-inch deep drawer.
Step 2: Choose the Right Acrylic Drawer Sizes
Not all stackable cosmetic organizers are the same. Some come with fixed compartments, while others are open bins. For a closet setup, I recommend drawers that are fully removable. That way you can pull out a drawer, take it to your vanity, and put it back later.
Best acrylic drawer sizes for lipsticks are usually 8 inches wide by 5 inches deep. Those hold about 12 lipsticks upright. For foundations, look for drawers that are at least 6 inches deep to accommodate tall pump bottles. If you have a lot of eye shadow palettes, go for a wider drawer that is shallow, about 2 inches tall, so they stack without crushing.
I personally prefer the ones with removable dividers. You can reconfigure the layout as your collection changes. That flexibility keeps the organizer useful for years.
Step 3: Arrange Drawers for Daily Access
Think about your morning routine. Place the drawer with your most used items at the middle height of your stack. For me, that means face base products like foundation and concealer go on the second level. Lipsticks and brushes go one level above, and rarely used items like specialty palettes go at the bottom.
If you have a reach-in closet with a shelf, measure the height from the shelf above to the shelf below. A typical stack of three drawers is about 12 inches tall. That fits under most standard closet shelving. Leave a few inches of clearance so you can slide the top drawer out easily.
Another idea: put a small tray on top of the stack for daily grab items like hand cream or hair ties. The flat top of acrylic organizers is sturdy enough for a small dish.
Step 4: Maximize Vertical Storage with a Simple Setup
The beauty of a stackable system is that it grows with you. Start with two drawers and add a third later. Do not worry about filling every inch at once. Empty space in a drawer means you can reach items without knocking everything over.
For brushes, I stand them in a narrow upright container inside a wide drawer. That keeps them organized without mixing with lipsticks. You can also buy acrylic brush holders that attach to the side of the stack, but I find the drawer method more stable.
Pro tip: label the front of each drawer with a small piece of washi tape. This saves time when you are in a hurry. Use a permanent marker on the tape, not on the acrylic, so you can change labels
Leave a Comment